As many you know, it is hot in the summer in Texas. I tried to take pictures at each stage, but the heat got to my brain and I missed some along the way.
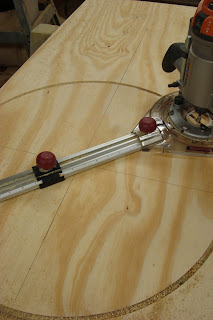
I started by routing circles in plywood for the body of the plane.
I was able to make two circles out of each 2'X4' piece that
I had the Pros at Home Depot cut down for easy transport.
We found an old chair for $5 at the McKinney Trades Days that I designed the size of the cockpit around.
I used a reciprocating saw to cut the legs off the chair.
I cut dados in the circles to fit my support braces.
I wanted to make the wings removable so I made notches in the side braces to accommodate.
You can see the notched side braces and the beginnings of the support for the seat.
I used a waterproof glue since it's final landing place was going to be in our backyard.
All the supports were 2X4's that I cut down.
I also wanted to make sure there was plenty of support throughout.
Cut a dashboard to fit in between the upper side supports.
Braces for the dashboard.
I cut 1/2" thick by 2" wide slats to sheath the plane in.
Sheathed the main body being sure to leave the notched area for the wings exposed.
I slightly beveled the sides of the slats to fit more tightly to the circular shape and used screws for to attach the slats.
On the bottom, I had to add wood supports for the wheels to attach to.
The cockpit of the plane completed.
...................................................
Making an Airplane - Part 2 coming soon!


No comments:
Post a Comment